The Perfect Facebook Link Preview | Sizing, How to Set, & Templates
Today I wanted to share a quick and simple SEO tip in the Facebook group. I made a post to see who might need the tip and the response was overwhelming. As I started looking at the links shared on the post, I realized my simple tip had a bit more nuance than I was thinking. Either way, it is a simple SEO tip that you can implement in a matter of minutes, so let’s get to it!
The tip is simple:
Make sure you have a perfect link preview when you share your website’s link on Facebook!
Seems simple right? But the more I dug into it, and after 600+ people left their link on the post, I realized there were even more problems than I anticipated. So instead of just leaving it to a single tip, I’m going to give you a list of things to check to make sure you have a perfect link preview, show you how to update the relevant information on popular platforms, and give you templates for preparing files that look right with the various Facebook crops.
A note before we begin:
The tags that control the information displayed when your link is shared on Facebook are called “Open Graph” tags (abbreviated OG or og:). Some platforms add open graph tags explicitly, which is the preferred method. When there are no og: tags provided, Facebook will try to construct them from other meta tags, like the page title, meta description, or featured image. Linkedin also uses Open Graph tags, but other platforms may have their own markup or methods for generating share previews. For example, Twitter has their own tags for generating Twitter cards. In this post, I’ll focus on Open Graph and the best share preview for Facebook, but many of the same tips will apply across any platform.
Checklist for the perfect Facebook website link preview
- Use your canonical website address every time you share your website.
- Use https:// (or http if you don’t have an SSL certificate) before your link when you share.
- Add an appropriate image for the share preview.
- Check your page title.
- Check your meta description.
- Update your og:title and og:description if you want them to be different than how they are displayed in Google.
- Check the preview using the Facebook debugger.
Lets dig into each of these.
Use your canonical website address every time you share your website.
Your canonical address is the single authoritative version of your URL. All other variations of your website address should ideally redirect to the canonical version. Variations might include www, no-www, http, https, trailing slash or no slash. There are several ways to check your canonical address if you aren’t sure. In Chrome, if you visit the website and look at the address bar, you should be seeing the canonical address. You can also use a Chrome extension like Open SEO Stats or the Moz Bar to see whether a canonical address is explicitly specified in the HTML of your page.
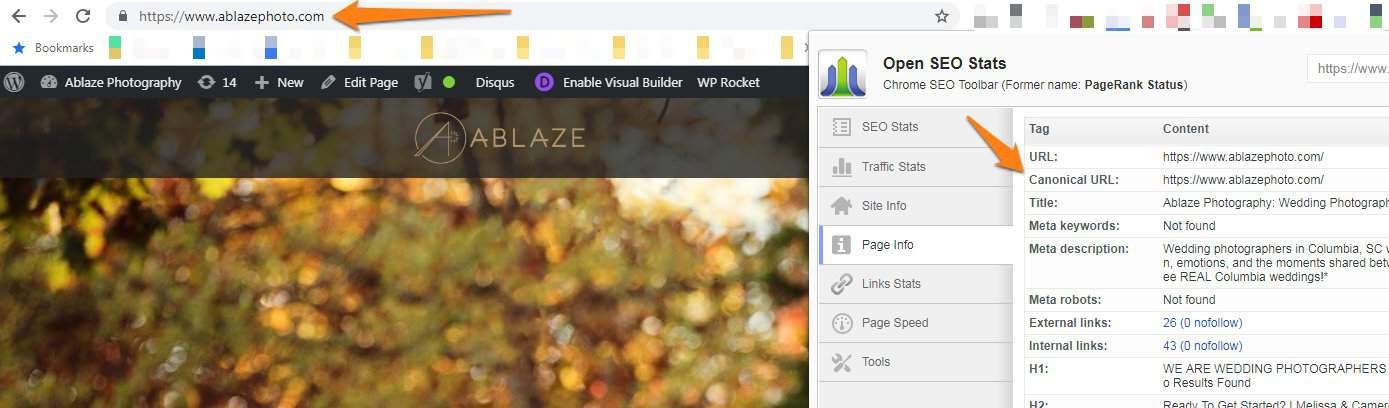
You can also see how Google is indexing your site by going to Google and typing site: in front of your domain. In the case of the above domain, I would type site:ablazephoto.com and see which address Google was indexing.
Perhaps my favorite tool for finding the canonical address is the redirect mapper by Varvy. Just paste in your address and see which versions redirect and which ones are available.
Once you know your canonical address, use that version of your domain every time you type it ANYWHERE online. Out of the 500+ links posted on the thread in Facebook, dozens of people would type the domain with various formats and capitalization, and sometimes this results in not getting a link preview at all.
Use https:// (or http if you don’t have an SSL certificate) before your link when you share.
I already mentioned this in the canonical tip, but it is worth mentioning twice. When you share your link on social media, you should include the protocol before the link. Hopefully your site has an SSL certificate and is loading securely with HTTPS. Including the https:// before the rest of the URL will signal to the text editor that a link is coming. Using an incorrect protocol (like using http when your site is https, or visa versa) may also cause problems with the link preview.
Add an appropriate image for the share preview.
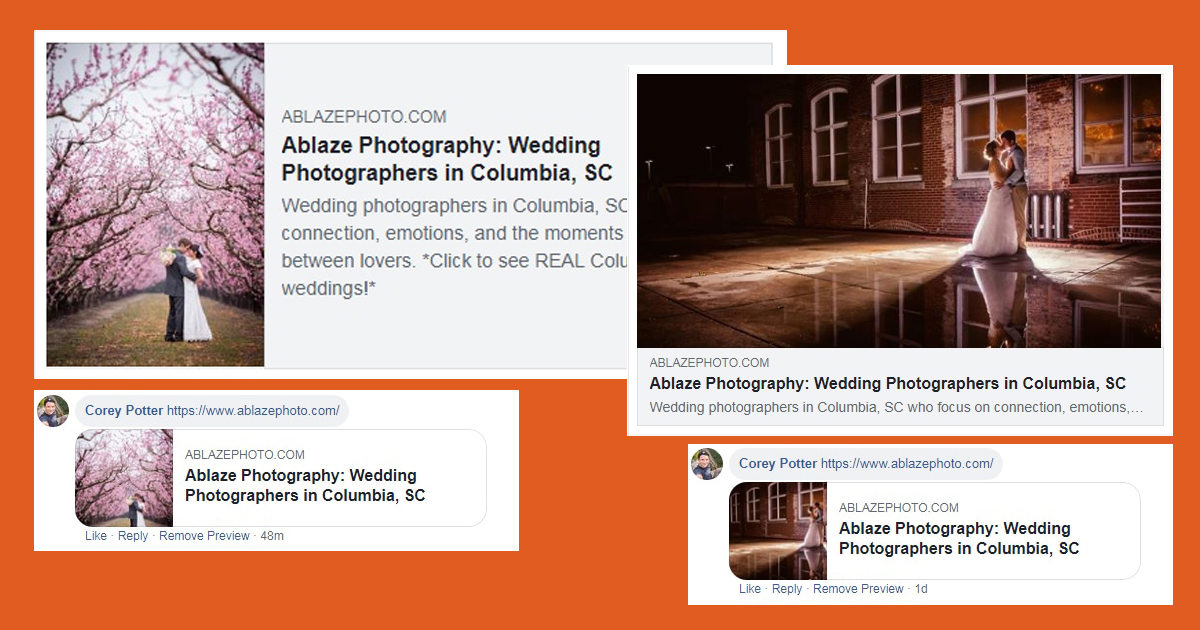
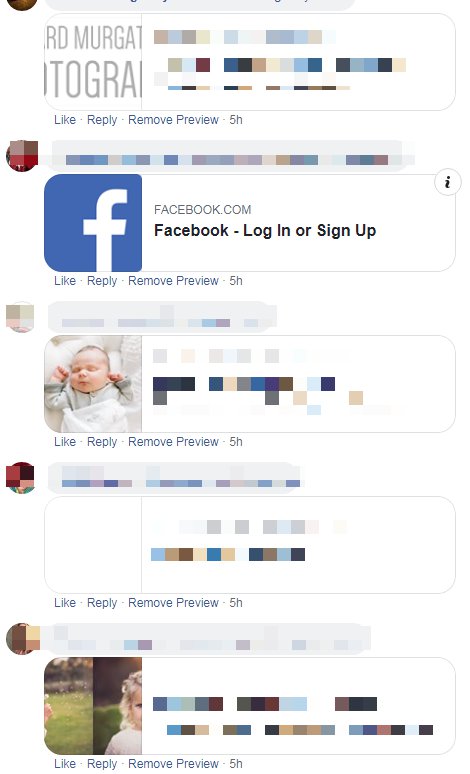
I was shocked at how many of the previews posted had terrible share images. Some didn’t have image at all, a large percentage were logos (many not even cropped correctly) and others were image collages or images that didn’t crop well at all. Here’s a random selection to show the variety…
As a photographer, it is very important that this image represent your brand well! Later in this post I’m going to give you some templates to download to make sure you know where the image will be cropped, the proper sizing, and which orientation works best.
For now, go ahead and decide on an image that represents your brand, or make sure you have a logo that crops well if you want to use a logo. When you are selecting this image, think about what would compel someone to click the link from social media. How will your website/link be shared? In many cases, you may not even be the one sharing your link, and it may have to compete with other photography websites. Will your image stand out from the crowd as carefully curated and representing the type of client or sessions you want to attract?
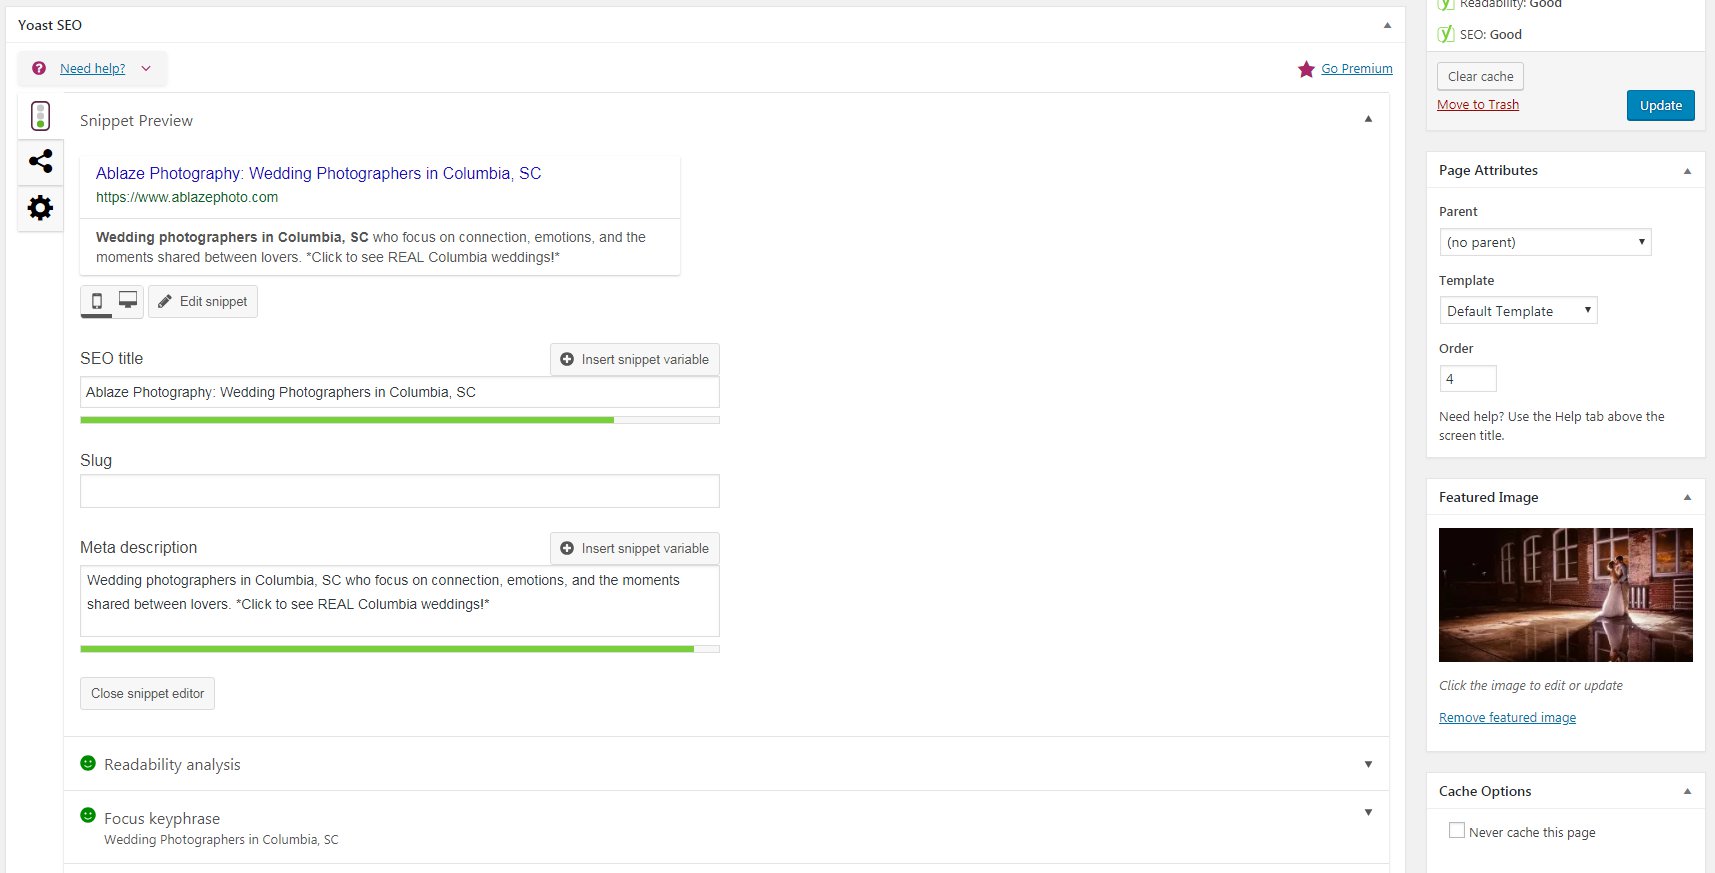
Check your page title.
This is the main reason I wanted to post this as an SEO tip. In the majority of cases, your page title will get used as the og:title. Even if you have a plugin (like Yoast) adding specific OG tags, they will usually be the same as the page title unless you have specified a separate title. So if you share your website on Facebook and see “Home” or no title at all, there is a huge opportunity not only for improving your share preview, but also to improve your general SEO with better page titles.
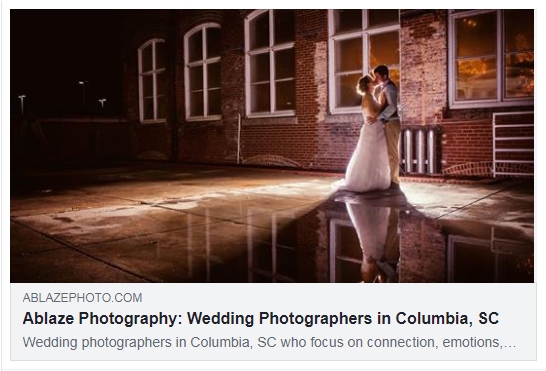
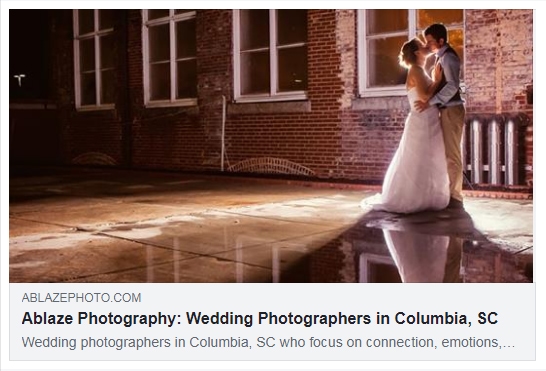
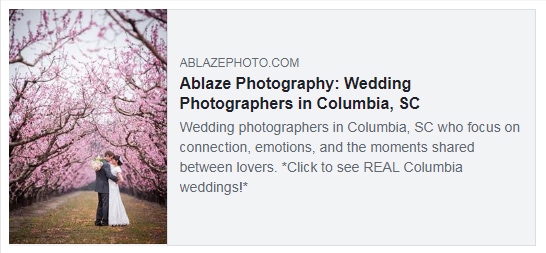
For SEO, a great template for a home page title is: [Your Brand Name]: [Your Main Keyword (include location)]. For example:
Ablaze Photography: Wedding Photographer in Columbia, SC
There are many nuances to consider for each SERP, but as a general rule, that template is a solid place to start. Make sure to check the length and make sure it isn’t going to get truncated on Google or on Facebook. This tool tells you a pixel width (which is how Google decides where to truncate). Usually you have between 55-65 characters. This article gives more tips on writing titles, especially for pages other than your home page.
One thing I noticed in the thread in the Facebook group is that many people had their keywords repeated 2-3 times. This is NOT how you want to introduce your business on social media!
Check your meta description.
Your website’s meta description will usually be the default og:description. In Google, the meta description is the text that shows below the URL. On Facebook, certain types of link shares will also use a description.
Your meta description is not a *direct* ranking factor, so don’t worry about stuffing it with keywords. Your goal with the meta description is to convince someone to click your link. You want to tell them exactly what they are going to get on the page they are visiting. There is not an “official” length that Google uses, but it is typically two lines of text, or around 160 characters. Some SERPs will show 4 lines of text, or 320 characters. Facebook will cut off the og:description at different places depending on where the link is shared, and some share formats don’t even use a description (like comment replies).
In general, make sure you get the most important part of your message is near the beginning of the description so that it will be seen even if the description is cut off early.
Pro tip: vertical images allow a much longer description to be displayed on Facebook.
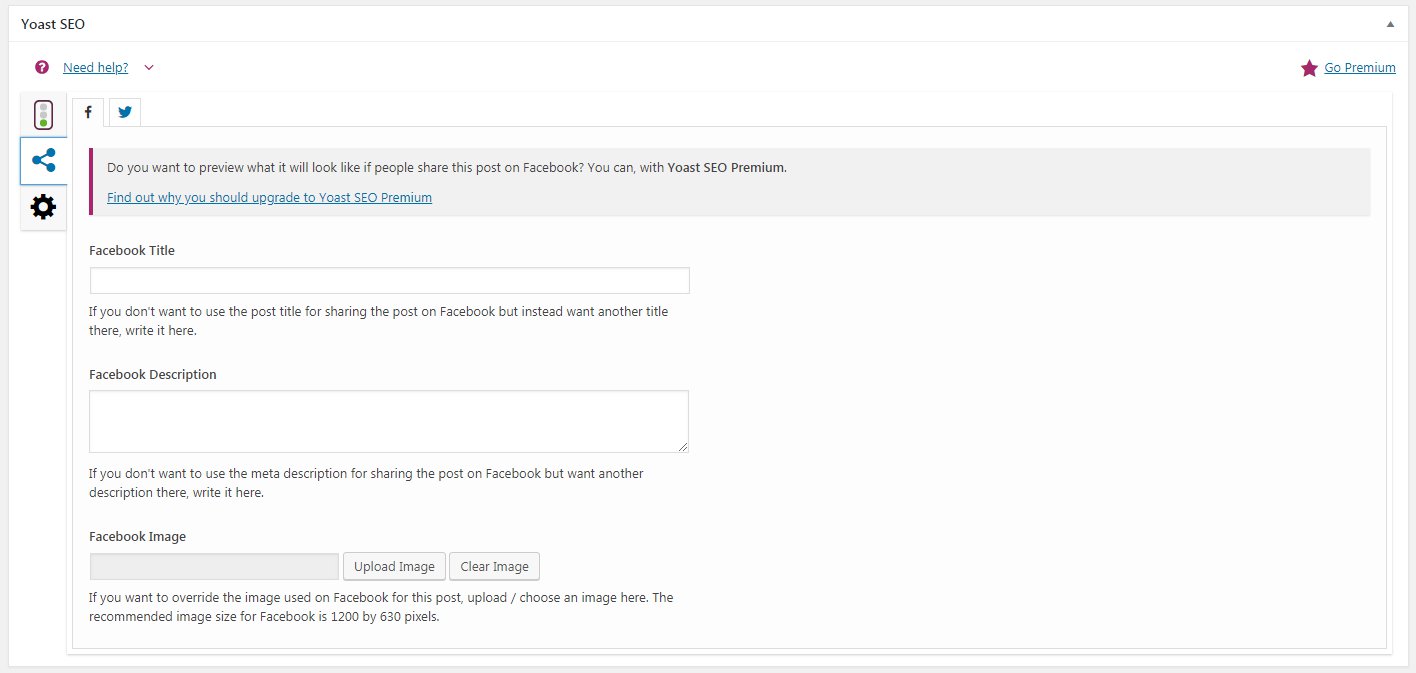
Update your og:title and og:description if you want them to be different than how they are displayed in Google.
With many platforms and plugins, you can change the og:title, og:description, and og:image for each page or post. In some cases, you may want to use a slightly different format for how your title and description are displayed on Facebook than how they are displayed on Google. Some platforms may not allow this, but if you are using Yoast, here is where you would change the OG tags for a specific page (note there is also a tab for Twitter cards).
This also comes in handy if your theme uses featured images in grids, or as banners. You may want to use a different image when shared on social media than what you would use in a banner or navigational image.
Check the preview using the Facebook debugger.
Finally, once you have everything exactly like you want it, you can check and debug your link preview with Facebook’s Sharing Debugger. This tool will allow you to “scrape” new information if you’ve just made changes (sometimes you need to scrape 2-3 times to pull in new information, and you may need to clear your page’s cache before scraping).
The tool will also show you errors, or missing information. You don’t always need to worry about clearing every error, as long as the share preview looks like you expected. However, if you are having issues and can’t get your share information updated, this tool is a great way to find out exactly what Facebook will display and where it is getting that information.
How to change your Open Graph tags on WordPress, Squarespace, and Showit
Most platforms will at LEAST let you update your title and meta description and many will also have a special place to add featured images, or a share image. Here I’ll show you how to update these using WordPress, Squarespace, and Showit.
How to update your Facebook link preview on WordPress
The nice thing about WordPress is that there are some basic defaults that will automatically populate the title and image tags, as long as you set them. Not only that, but there are dozens of plugins available to help with OG tags and social sharing. I recommend using an SEO plugin to edit your title and meta description, and then setting your featured image to be the image you want used when that page or post is shared on social media.
I already posted above how you can use Yoast to set specific OG tags. However, if you’re using another SEO plugin, just know that you need to set your page title, meta description, and the featured image.
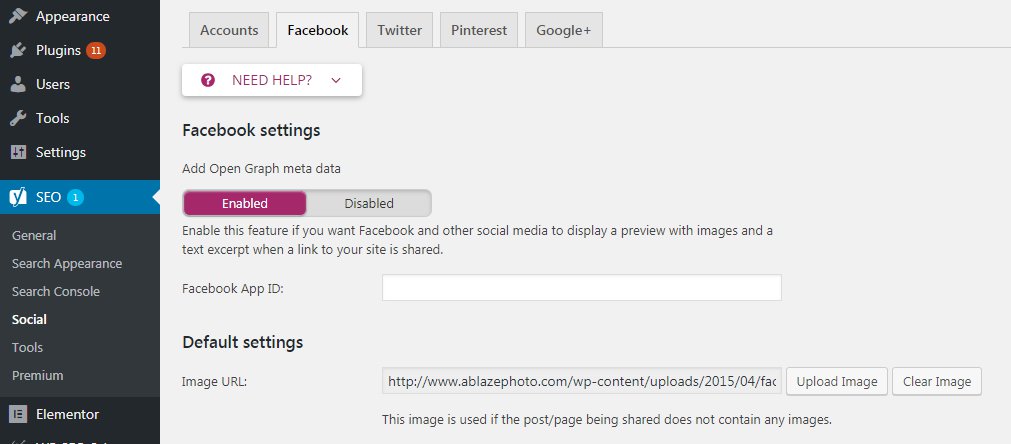
In some cases, you may have a theme that offers a different place to update social sharing defaults, or you may be using plugins that conflict with one another. Yoast also has a place in the main Social settings to enable or disable Open Graph (you may need to disable if there is a conflict), to enter your FB App ID, and to set a default share image when another can’t be found.
If you are still having trouble finding where to update your social link preview on WordPress, I’d love to hear from you in the comments!
How to update your Facebook link preview on Squarespace
As is common with Squarespace, you don’t have as much control or flexibility over your share preview. It can be manipulated to an extent, but only indirectly, and with fields that aren’t really labeled well. Unfortunately, your home page and all other main pages will likely use the same share image. Squarespace gives you one field called “Social Sharing Logo” and most people upload a logo here. Because every main page will likely use the same image, it can make sense to use a logo here. For instance, if you have a weddings page, a headshots page, and a family page, you probably don’t want the share image for each of those pages to be a headshot photo.
The social sharing logo can be found under Design>Logo & Title>Social Sharing Logo (at the bottom).
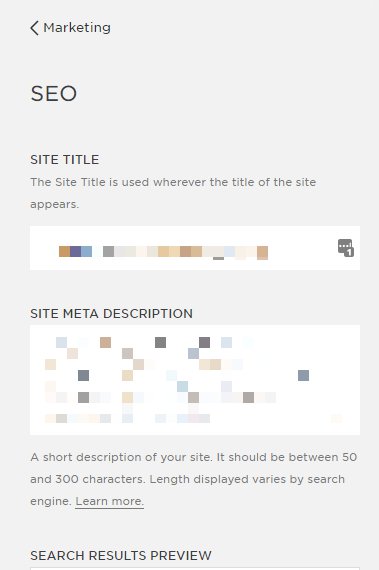
The home page title and description can be found under Marketing>SEO>Site Title and Site Meta Description.
On other pages, you’ll need to adjust your title formats and set the title on the page itself. On blog posts, you can set a thumbnail under Edit Post>Options.
In this official Squarespace help document you’ll find which fields will generate a share image on Squarespace.
You may also want to check out this Facebook share troubleshooting guide from Squarespace.
How to update your Facebook link preview on Showit
On Showit, the way you set the title, meta description, and featured image will depend on whether you are working with a Showit page or a blog template or post.
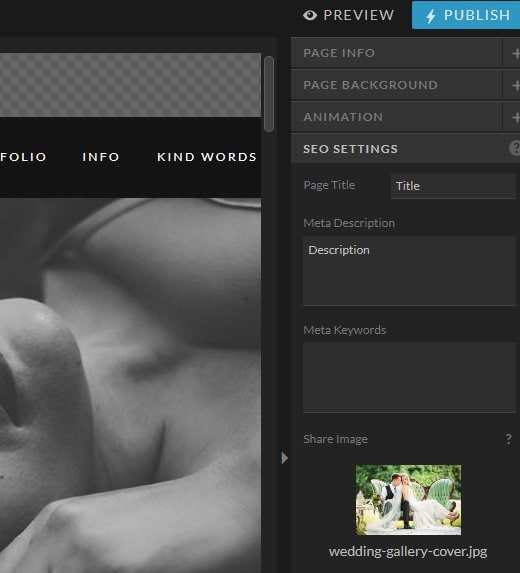
For Showit pages, it is simple to set this information in the SEO settings pane.
However, if your home page is a blog template, you’ll need to go over to WordPress and set the title, meta description, and featured image of the page or post as described in the WordPress section above.
Choosing the correct OG image size and crop
When it comes to choosing the right size for your Facebook share image, there are three options:
- Horizontal: 1200px by 630px
- Square: 1200px by 1200px
- Vertical: 900px by 600px
It is important to note that Facebook will always take a square crop in some circumstances, like comment replies. If you upload a square image, you’ll still get a horizontal crop on a full size share.
I made some Photoshop templates with guides enabled to show where the cropping will be on different orientations.
Here’s what each one looks like:
Horizontal
Square
Vertical
If you would like to download the Photoshop files just click each link below to download the PSD directly.
All (Zip File)
Horizontal
Square
Vertical
Be sure to turn on guides with cmd or ctrl + : to show the crop lines.
Interesting data from the Facebook post
Links shared: ~610
Times the word “home” appears: 190
I wanted to share how many logos were used, how many poorly cropped photos, how many missing titles, etc, but when I load all of them it causes my browser to slow down so much I can barely scroll lol. I’ll see if I can export and update the rest of the data then!


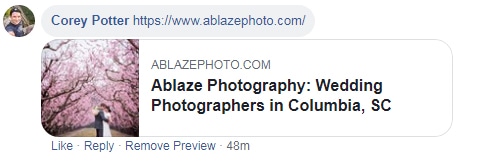
Nicely posted and beautiful description